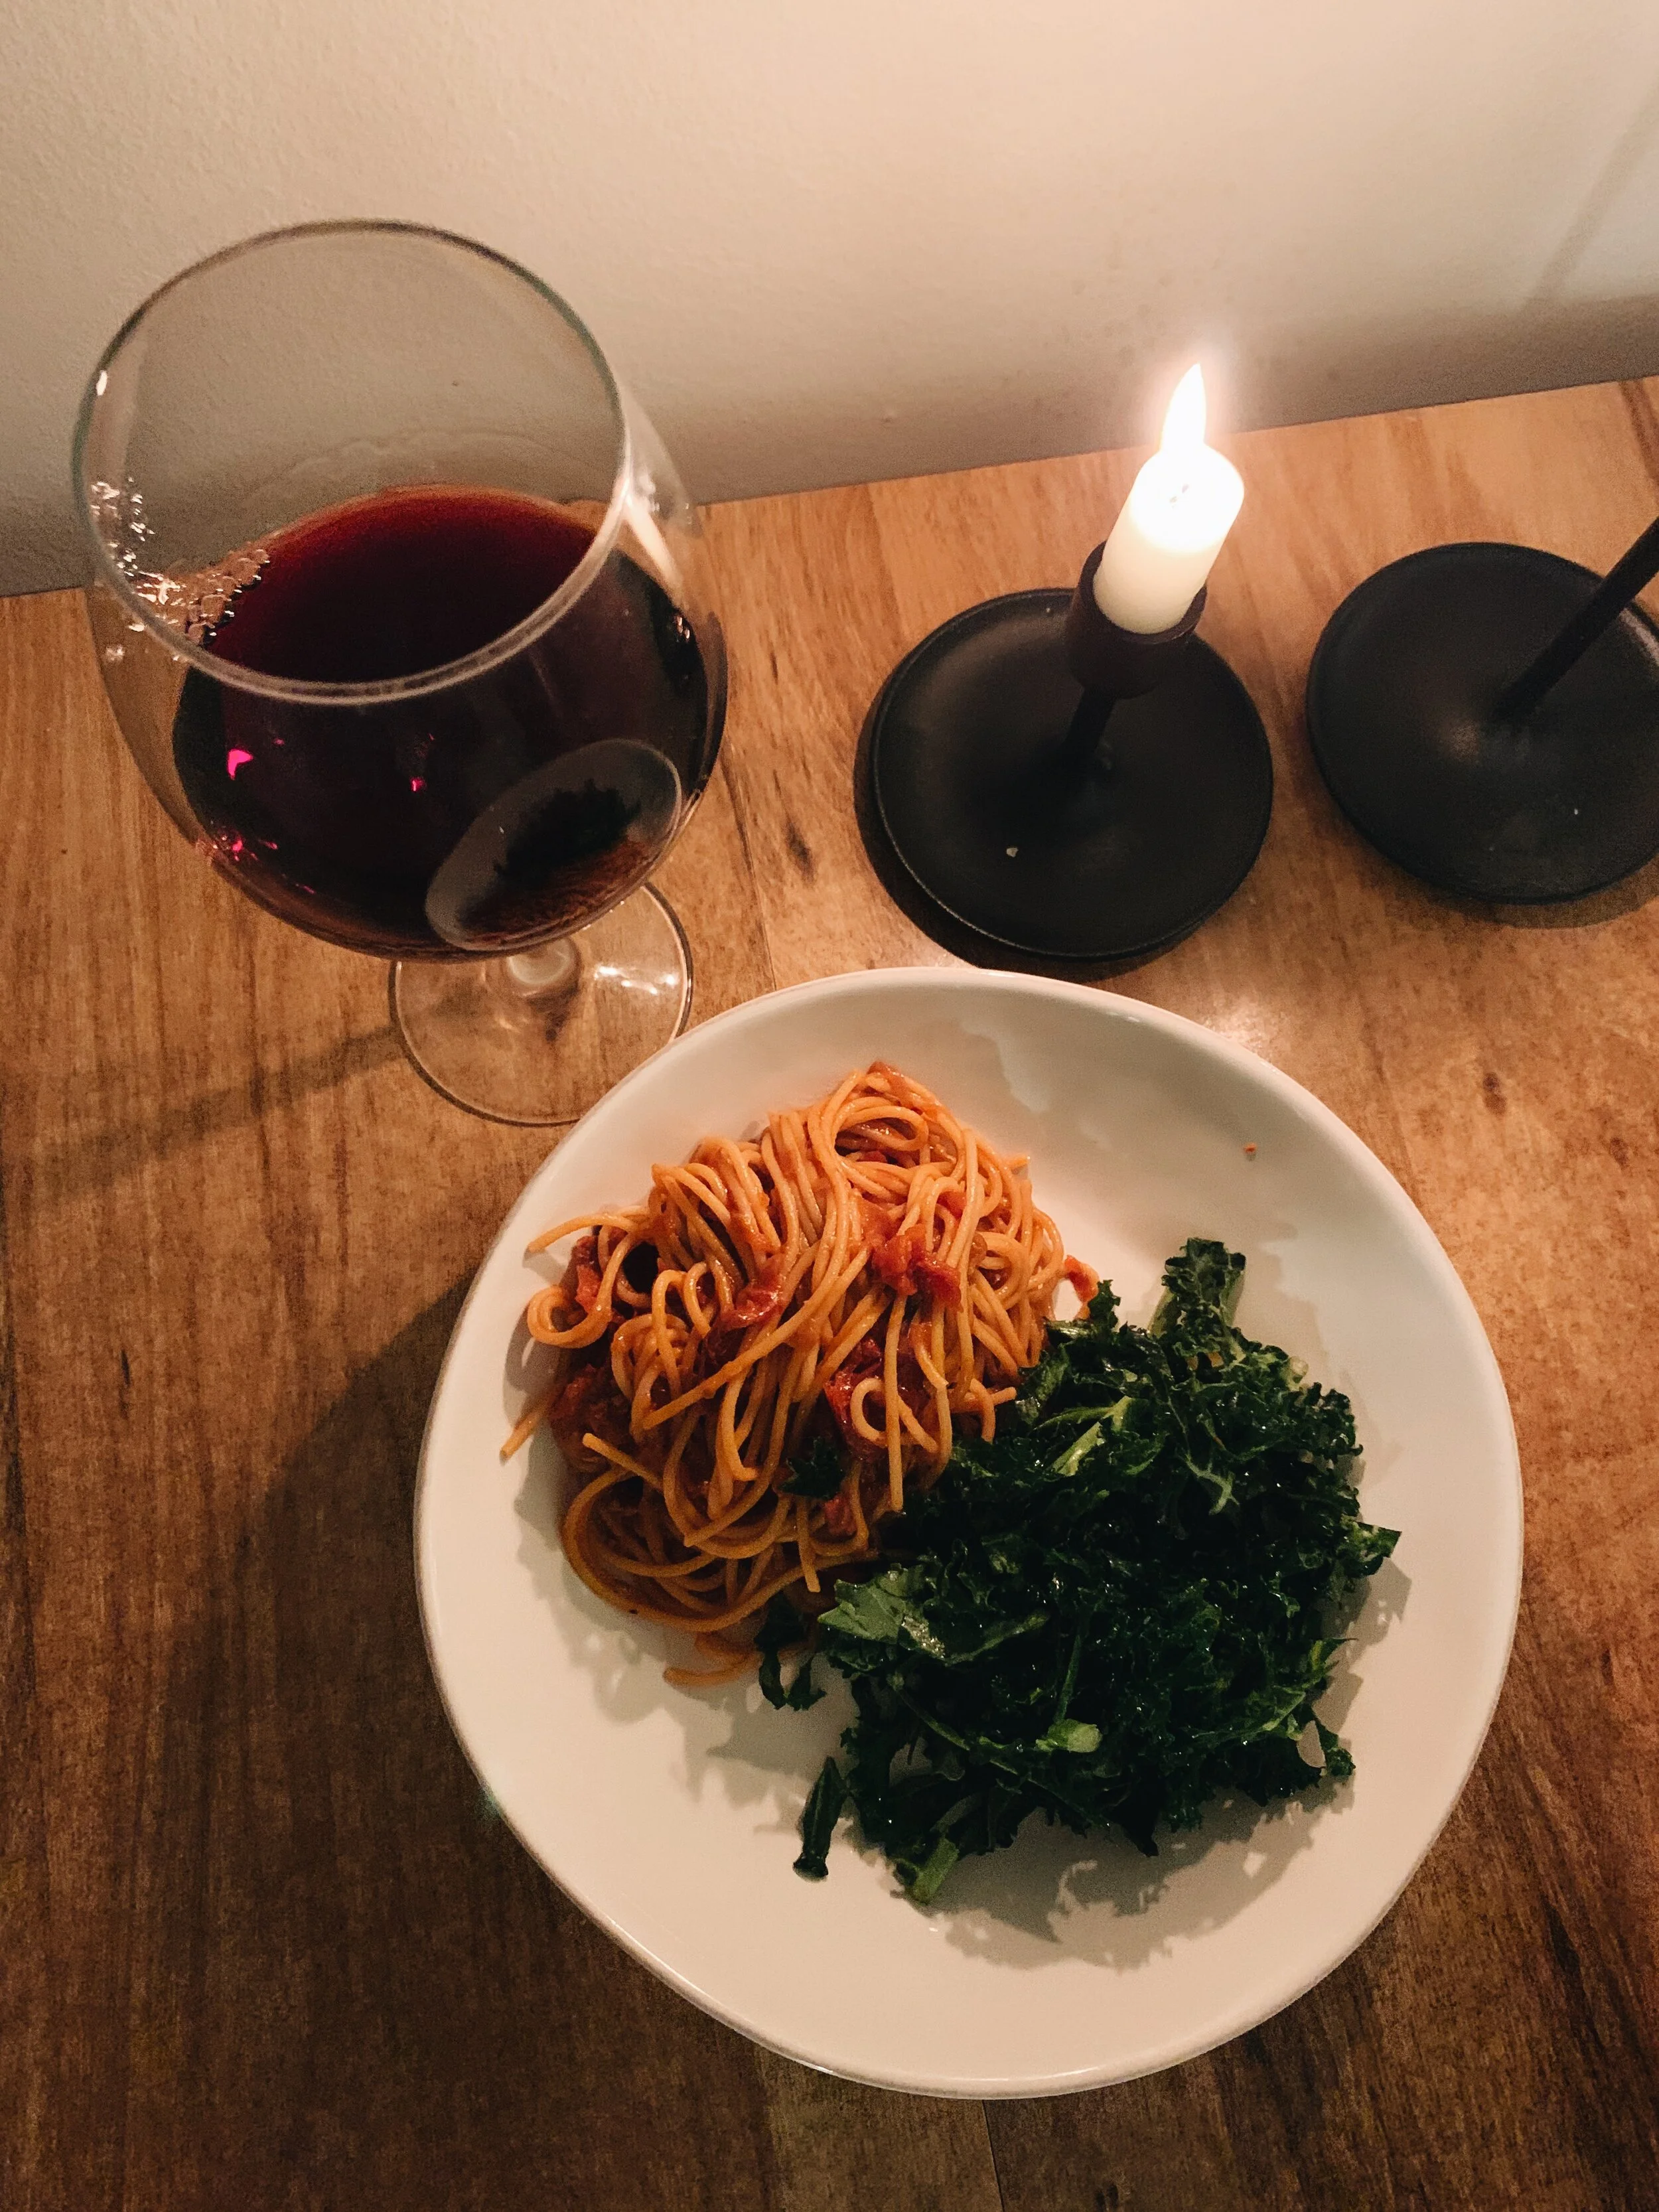
Roasted Tomato and Anchovy Bucatini by Alison Roman

My goodness, this tomato sauce made me swoon. It’s worth every hour it takes to make. This recipe is NOT Alison’s Shallot/Anchovy pasta which went absolutely viral in 2020. That pasta is really good, but I liked this one better. Mostly because I’m in love with tomatoes.** And this sauce still has that lovely umami flavor that only anchovies can bring. (No, you absolutely may not skip the anchovies. Don’t ask that.)

My cooking timeline. 

2:40pm - I slice and arrange the tomatoes in their baking dishes with some smashed garlic cloves and fresh thyme. Into the oven they go.

3:26pm - I’m sitting on my living room floor and writing the Hard-Roasted Cauliflower entry. My thoughts are suddenly interrupted by the smell of roasted tomatoes. Heaven. 

4:10pm - I turn on the oven light so I can spy on the tomatoes. 

5:30pm - I sneakily spoon a few of the smaller tomatoes out of the baking dish and snack on them with some flaky sea salt. I’m pretty sure I could just eat all the tomatoes for my meal and feel totally satisfied.

5:48pm -  Tomatoes will be ready soon, so I slice and sauté the red onion. I add the anchovies, watching them melt and disappear before plopping in some tomato paste. 

5:59pm - I start bringing my pasta water to a boil. 

6:05pm - I take the tomatoes out of the oven, the sizzling olive oil makes crackling sounds as the roasting pan sits on top of my stove. I spoon the tomatoes into the pot with the onions and stir. The smell is incredible. 

6:10pm - I cook my pasta. I used yellow lentil & brown rice spaghetti noodles from TJ’s, and quite frankly, I couldn’t tell the difference between regular wheat pasta. (I’m GF by necessity, not by choice, believe me. So no bucatini, but something close enough.)

6:12pm - I watch the tomatoes slowly break down and the sauce thicken in the pot. 

6:18pm - I add the cooked pasta to my sauce pot with some cooking water and swirl it all until the sauce sticks to the noodles. I plate the pasta with a simple kale salad with lemon. Dinnertime magic. J confirms that this is the only tomato sauce I should ever make in the future. 

6:45pm - I do the dishes, and remember to reserve the leftover olive oil from the tomato dish. I’ll use it on a roast chicken for a dinner party with my in-laws tomorrow.  

I eat the pasta leftovers for my lunch the next day and feel zero bitterness about eating leftovers for lunch. 

8 recipes cooked, 217 recipes to go.

roasted-tomato-anchovy-bucatini-alison-roman-plated.jpg

**Below are several anecdotal memories I have of tomatoes, because I’m trying to write about my experience with food as much as the recipes themselves. 

  1. My first memory of tomatoes is eating my mom’s spaghetti with “red sauce.” I grew up on a limited rotation of dependable dinners like ground beef tacos, chicken and broccoli casserole, and spaghetti. The best nights were always spaghetti nights, not because of the pasta, but because of the tangy jarred marinara sauce. 

  2. I’ve lived about 40% of my life in the Chicagoland area which is known for its deep dish pizza. And since you (didn’t) ask, I will declare that the best pizza in all of Chicago is from Lou Malnati’s for the sole reason that their pizzas are sauce-forward. Their sauce is made from a balanced blend of tomato chunks and pureed tomato, and it’s perfectly salty and infused with garlic. I always ask for an extra bowl of sauce to dip my pizza into, because it’s that good. 

  3. In 2019, my husband and I lived our best lives in Italy. We took a 3 week trip there to celebrate his grad school graduation. We hiked by the ocean, looked at countless pieces of art and architecture, and Vespa’ed through wine country. If I could really live anywhere, I’d pick the quiet hillside town of Assisi. Since most of our days were filled with nonstop carbo-loading (and cheap wine drinking), we figured we better eat at least one meal on the “healthier” side each day. So every few days, we’d find a local food market and buy butter, a carton of eggs, and a box of fresh cherry tomatoes to cook our own breakfast (before later going to a cafe to buy fresh croissants). I don’t know if it was the lack of pesticides, or the climate, or the novelty of being in Italy, or some combination, but those cherry tomatoes really were the most juicy and flavorful tomatoes I’ve ever had. No cherry tomatoes, even in California, have matched them since.  

best-life-in-italy-annie-varberg.jpg

Me living my best life in Italy by the sea.

Paprika-Rubbed Sheet-Pan Chicken with Lemon by Alison Roman

When I was first learning to cook for myself, I made a lot of chicken. I was still under the impression that a proper meal consisted of meat, a starch, and a vegetable. Chicken seemed like the most approachable meat at the store, since it’s practically the only kind my mother cooked while growing up, besides ground taco meat. But after a year of rubbery, overcooked chicken breasts with little to no flavor, I was decidedly anti-chicken. The following year, my kitchen became basically vegetarian and my diet little more than black beans, sweet potatoes, kale, and chips & salsa. Since the backlash year, I’ve dabbled now and then in chicken thighs and breaded chicken, but I never craved chicken, and never did I choose to cook it unless asked. 

Until now. 

I’m not using hyperbole when I say that Alison Roman has single-handedly made me into a chicken lover. This paprika-rubbed chicken is the third chicken recipe of hers that I’ve made in a month. “Don’t stop me now, ‘cause I’m having a good time…” 

Just like the cover recipe of nothing fancy [see my post about Slow-Roasted Oregano Chicken], this darling of Dining In requires few ingredients, little skill, and almost no active time, and yet it yields the most juicy, flavorful, I-might-eat-the-whole-bird-in-one-sitting chicken. The chicken spends 2-3 hours (depending on the bird’s weight) in the oven at a low temp while the meat soaks in the oil and spices and the skin gets browned and crisp. Only some quartered lemons accompany the chicken on the rimmed sheet pan. 

The first step is to spatchcock the bird, which is to cut out the backbone of the chicken, allowing it to lay flatter and roast quicker. Spatchcoking is the only true skill you need to make this recipe. I first learned to spatchcock when we lived in Houston and my pal Margaret (I’ll mention her a lot in this project, it’s inevitable) encouraged me to make a buttermilk-brined chicken by Samin Nosrat. I watched this tutorial and got it right on the first try. Not because I’m super cool, but because it’s easy to do. You just need some sharp kitchen shears and a have-no-fear attitude when you hear those backbones cracking. Also, once you know how to spatchcock, you can start telling your friends that you know how to spatchcock and it will sound mysterious and sort of intimidating, and you will seem fearless and strong* (because you are). 

Smoked paprika AND hot paprika are used here, along with fennel seeds and chile flakes. Alison loves her fennel seeds, my goodness. I had a bottle of them sitting on my shelf the last few years, and within just 4 weeks of this project, I drained it. These four spices diffuse into the olive oil as the chicken roasts, and the leftover oil (post roasting) can be used to toss with veggies or as a bread dip. 

smoked-paprika-rubbed-chicken-lemon-annie-alison-roman.jpg

She tells you to roast everything on a baking sheet (see recipe title), but doesn’t say anything about foil or parchment, which is my usual M.O. Here I chose to trust Alison, and put the bird on a bare baking sheet. There were no issues, and it cleaned easily. 

Of the three whole roast chickens I’ve made so far for this project, this one was J’s favorite. I served it with a simple kale salad and Alison’s Spicy Garlicky White Beans (post forthcoming). The leftover meat made a phenomenal chicken sandwich (I <3 sandwiches).

*I don’t know this from experience -- I haven’t actually tried to announce this at a party -- but I bet I’m right.

7 recipes cooked, 218 recipes to go.

paprika-rubbed-chicken-finished-annie-alison-roman.jpg

Slow Salmon with Citrus and Herbs by Alison Roman

Madeline took her first bite, and the next words out of her mouth were: “This is the best salmon I’ve ever had.” 

J asked for salmon for his birthday dinner. We were having our favorite couple friends in Minneapolis over to celebrate and I wanted a full Alison Roman meal, top to bottom. But salmon was not what I expected J to ask for on a cold January night. (I associate fish with warm, summer days!) 

Thankfully Alison has multiple salmon recipes between her two cookbooks, and I only needed to read the introduction to this Slow Salmon with Citrus and Herbs recipe to know which one I would be making. She tells us in no uncertain terms that the common response from anyone eating this fish is “this is the best salmon I’ve ever had.” In case I needed any proof, Madeline’s first words were verbatim from the intro. So without further ado… 

Buy a 1.5 lb salmon filet, preferably fresh but certainly thawed if from frozen. I primarily rely on Trader Joes and Costco to have affordable, fresh fish. The filet is laid in a deep baking dish (not a rimmed sheet pan because you’re about to let the fish dive into a legitimate swimming pool of olive oil). Cover her with plenty of salt and pepper. Then layer the top of the filet with thinly sliced citrus and sprigs of fresh herbs. 

slow-salmon-citrus-herbs-annie-alison-roman.jpg

I chose sliced lemon and navel oranges. I tried to slice them between 1/8th to 1/4th inch thick, but I’ll say that the closer you can get to 1/8th, or thinner, the better. My thicker slices rose above the oil and didn’t melt into the fish the way I hoped. Next time I’ll slice my citrus even thinner. I liked the orange and lemon combo, although you can use other citrus like tangerines and blood oranges. The herbs are also flexible. I chose dill, chives and parsley.

Lots of salmon recipes use citrus and herbs, but what makes this one so special is the seemingly excessive amount of olive oil it bakes in and the low-and-slow baking method. 

For years I watched my mother skimp on fattening ingredients like butter and olive oil. I spent my first years of independent cooking doing the same. She was doing her best to control cholesterol for her and my dad (important!), and that was back when fats were overemphasized as all bad. It wasn’t until I started learning about the science of cooking and following some other New York Times chefs that I became confident in using that whole stick of butter. So when Alison tells me to pour 1.5 cups of olive oil over my fish, I’ll do exactly that. 

The recipe says that the dish is baked at a low temp of 300 degrees for upwards of 30 minutes, which doesn’t sound terribly slow. Perhaps it’s a difference in ovens, but my oven did not cook my salmon in the time Alison told me. I started checking it with our meat thermometer at 30 minutes, and it was still 30 degrees undercooked. I was aiming for a 135 degree internal salmon temperature. I resorted to turning up the oven to 315, then 325, and checking the oven every 7-8 minutes. By the 55 minute mark, the salmon was cooked through perfectly. Next time, I’ll start with my oven set to 310 and start checking around 40 minutes, just to meet Alison halfway. 

The salmon I chose had a thicker center which means it rose slightly above the oil. While I think that is perfectly fine, I will say that that portion of the fish didn’t get as melt-in-your-mouth as the thinner parts did. So pay attention to the thickness of your cut and perhaps adjust the olive oil accordingly. 

Once the fish is cooked, it’s topped with 2 whole cups of chopped herbs. Yes, TWO CUPS. It’s like a lovely fresh salad on top of your fish, and it plates beautifully. Don’t skimp on the herbs, either. 

In case you’re wondering, here was my full menu: 

This was the best salmon I’ve ever had. It will most definitely be had again.

6 recipes cooked, 219 recipes to go.

slow-salmon-plated-annie-alison-roman.jpg

Spicy Pork Meatballs in Brothy Tomatoes and Toasted Fennel by Alison Roman

My childhood best friend, Kearci, and I tend to share brainwaves even though we live more than 2,000 miles apart. Our recent annual Christmas gift exchange is just one example of our shared consciousness, since we each gave the other a copy of our most trustworthy cookbook. Kearci gave me nothing fancy by Alison Roman, and I gifted her with Dinner by Melissa Clark (we love our NYT authors). Delighted, we sat together on her apartment porch and flipped through the books for well over an hour, pointing out our favorite recipes as we ooo’ed and ahh’ed over the gorgeous food pictures. I flipped to “Spicy Pork Meatballs” and read the name out loud. Kearci snapped her head up and without hesitation told me that this recipe “will change your life.” I’ll grant that we tend to use some hyperbole when we’re together… We discovered in middle school that overtly dramatic conversations were a perfect way to make each other laugh. But Kearci is also someone who feels things strongly, so I knew to take her seriously. 

Good thing I did. I’ve always been a fan of meatballs. Sadly and gladly, these ones may have single-handedly ruined all others for me. Because it’s not just the meatballs that get you, it’s the broth they float in. 

Let’s start with the meatballs themselves. Alison suggests using pork, turkey, beef, lamb, or a combination. I chose pork and turkey because I wanted a less fatty meat to balance out my pork. I think the combo worked fine, but turkey never has as much flavor as I want it to. Next time I’ll try a pork and beef pairing. To assemble the meatballs, the meat is mixed with garlic, fresh herbs (chives, parsley, I threw in some thyme I had on hand), dried spices (fennel seeds, paprika, pepper flakes), and yogurt. This was my first time adding yogurt to meatballs -- I’m used to eggs or ricotta as the binding agent. The yogurt worked surprisingly well. 

Once mixed, it’s time to form those balls o’ meat, into a 1½” diameter, or as Alison puts it, “about the size of a plum.” If you’re like me and you have a hard time approximating sizes or picturing how big a plum should be, I suggest taking out a ruler for reference. Why? Because these meatballs will fall apart if they’re too large. I say this from experience. At least half of my meatballs lost their ball-shape during browning, and I believe one reason was that they were too large, and therefore not compact enough. Learn from my mistake. 

spicy-pork-meatballs-recipe-note-alison-roman-annie-varberg.jpg

Note to self: make those meatballs smaller than you think they should be. And yes, I write in my cookbooks like a journal.

Once your on-the-smaller-side meatballs are formed, it’s time to brown them in a pot filled with a layer of olive oil. I made another mistake at this step -- I let the pot get too hot. The oil gets really excited after sitting in the same pot over strong heat for 20 minutes of browning, and by the last few meatballs, it browns the outside quickly without leaving enough time for the inside temperature of the meatball to rise. This is where half my meatballs fell apart. So while I recommend turning the stove to medium-high heat at the start, per Alison’s instructions, I’d say that after that first round of meatballs have finished browning, turn down the heat as necessary so the oil doesn’t get too piping. And beware of some oil splatters - I wore long oven mitts as protection. 

Another reason why these meatballs ruined other ones: In the past, I’ve been told to bake my meatballs in the oven. While a less messy and perhaps easier method, baking, I now realize, doesn’t help the meat reach its full potential. Baking means the meatballs remain soft and spongey (especially if you’re using ground turkey). The fat tends to become liquid and oozes out of the meat. Browning keeps the fat in and turns it into a charred, salty meatball exterior, offering up more flavor and aesthetic appeal. So yes, browning is worth your time, and yes, the mess too. 

While the first half of this recipe didn’t go as smoothly as I’d hoped, the second half was much more seamless, and made up for some of my early mistakes. 

In the same pot that you browned the meatballs, add shallot and garlic and saute until lightly browned. Then cherry tomatoes are added and cooked till bursting. Finally, water and vinegar complete the broth ensemble. Don’t forget to scrape up any bits of fat and crumbled meat that were left on the bottom of the pot. Simmer the sauce for a few minutes and add the browned meatballs back in. Any inner raw parts left in the meatballs will be taken care of as they finish cooking in the simmering sauce. The flavors should all be best friends by now, and can invite a few more over for the party, mainly mint, pepper flakes, and more fennel seeds. I added some shaved parmesan as well and served with fresh sourdough for soaking in the broth. 

Kearci strongly recommends saving these meatball leftovers and eating them in a sandwich/sub form. You can even dip your meatball sandwich into the broth like an au jus!

5 recipes cooked, 220 recipes to go.

Tomato-y White Beans with Breadcrumbs and Preserved Lemon by Alison Roman

I didn’t grow up eating beans. My mother doesn’t care for them. She says their texture and appearance reminds her of dog food. She never once cooked them for us as far as I can remember. My first memory of eating beans took place in high school. My school campus was a short walk from a Del Taco (think Taco Bell but more questionable) and it was a popular activity among my friends to go there for an after-school, pre-theater rehearsal snack. One day I found myself strapped for cash (this happened a lot, and I didn’t have a debit card yet), so I had to order the cheapest thing on the menu -- the $0.99 bean and cheese burrito. I literally never ordered anything else again. I craved those gooey, slightly spicy, almost creamy beans starting at 3rd period until I could get off campus at 3:15pm to eat my cheap bean fuel. In college, I ate beans any time they were offered at the cafeteria. Canned beans sustained me in my early postgrad years. An affordable, healthy, protein-rich meal that I never tire of. 

So yeah, Tomato-y White Beans was one of the first recipes I made from nothing fancy. It wooed me from the Table of Contents. 

While this recipe can be found in the “Sides” section, please don’t think this isn’t a meal unto itself. As Alison says in her introduction, “‘Side dish’ is a very misleading term.” 

Let’s talk about the 3 core elements named in the recipe title; their combination is what makes this recipe so unlike any other bean dish I’ve made. Together they make a richly satisfying, well-textured, and bright meal. 

Tomato-y white beans. Alison makes multiple statements about how fresh shelled beans will change our lives, and I bet she’s right. But alas, in the winter with no farmer’s market available, canned beans are all I can find. And they’re still delicious. 

Of all the white bean varieties, I chose to make this with cannellini beans. In my experience, cannellini hold their shape better out of the can and have more flavor than Great Northern White beans. To make the beans, you need to sauté some thinly sliced onion and garlic in a good bit of olive oil. Then add a big glob of tomato paste and chile flakes, before dumping in the beans with water and letting them simmer until they’ve turned soft and creamy. At every step, she has you season with salt and pepper. Sort of sounds like most pot-of-bean recipes, right? It’s the next two ingredients that change the game. 

Breadcrumbs. Fresh breadcrumbs. Whatever you do, please don’t buy these at a store. Store bought will not achieve the texture you’re hoping for. Instead, take fresh or stale bread from your fridge and tear it to smaller pieces that can be pulsed in a food processor to proper crumb size. Alison asks you to toast the crumbs in a large pot with another pool of olive oil until they are a glistening golden hue, then sprinkled with salt and pepper. These crumbs will provide the crunchy textural contrast that makes this bean dish so special. 

And finally preserved lemon. This ingredient brightens this dish spectacularly. It also requires some forethought. I believe you can buy preserved lemons at a grocery store, but it’s just as easy to make your own. This was my first time preserving lemons, and I chose to use a short-cut recipe by Mark Bittman. (I’ll soon be preserving more lemons and will use a recipe that yields a more shelf-stable jarful. However this recipe produced great results and is a reliable last-minute method.) 

Once the beans have achieved the soft, creaminess level you’re looking for, turn off the heat and add chopped preserved lemon bits to the pot. Sprinkle the breadcrumbs over the top and serve. Every bite explodes with flavor and rich texture -- the creamy beans in a spicy tomato sauce, dappled with sweet and sour lemon bits and crunchy, oily, salty breadcrumbs. 

I’ve made this recipe twice already - once for J and I, and once for guests, too. I served it with Alison’s Garlicky Broccoli and Greens, which I’ll explore in another entry soon. I think some fresh bread would also do nicely. The beans made great lunch leftovers. 

I’m writing this on a Wednesday morning, and while it’s only 10am, I’m now starving. I think I’ll go make this recipe for lunch!

1 recipe cooked, 224 recipes to go.

Tomato-y-white-beans-breadcrumbs-preserved-lemon-dinner-alison-roman-annie-varberg.jpg